Configure access
You need to configure access to the STACKIT project, before you can start using STACKIT Functions. In particular, you need to configure:
- Permissions for your STACKIT account to be able to access STACKIT Functions.
- Registry secrets for STACKIT Functions to be able to access your OCI container image.
Needed permissions
For your user account to be able to deploy functions in a STACKIT project, it needs to have the relevant functions.* permissions, included with the “owner”, “editor”, and “Functions Admin” roles:

You can assign one of these roles using the IAM and management portal, as described in Assign roles to a user or service account.
Logging in
To authorize the STACKIT CLI, use the sfn auth login command:
sfn auth login --project-id <your project ID>
This should open a browser window in which you can give the sfn CLI access to your account.
In addition, the STACKIT CLI will enable the Functions service for your project.
For programmatic access, you can also use service account keys:
sfn auth login --project-id <your project ID> --service-account-key-path <path to service account key.json>
Note: you need to log in at least once with a user account, as the CLI will not attempt enabling the STACKIT Functions service from a service account.
Registry access
To be able to push and pull private function images, the STACKIT Functions CLI and runtime require access to a Docker/OCI registry. If you do not already have an OCI registry for your project, you can use the STACKIT Container Registry.
CLI
The STACKIT Functions CLI uses registry push secrets, that allow it to upload images to the OCI registry. By default, it reads these from your Docker configuration at ~/.docker/config.json.
When using the STACKIT Container Registry, you can follow the instructions at “Create your first Container Registry” in order to authenticate to the Container Registry using the Docker CLI. Other registries will have similar instructions in their documentation.
Runtime
The STACKIT Functions runtime needs registry pull secrets, that allow it to upload images to the OCI registry.
You can configure the registry pull secrets using the STACKIT Functions CLI:
sfn pull-secrets create --address <address>
The command is interactive. It will prompt you for your registry credentials:
Username: <enter username with pull access>
Password: <enter password>
This command will create a new registry credentials configuration in your project, which you can later use when deploying functions.
NOTE: When executing the command, the program will try to access the registry with the provided credentials before submitting. You can disable this check with the –no-validate flag
sfn pull-secrets create --address <address> --no-validate
When using the STACKIT Container Registry, we recommend that you can create a Robot Account for STACKIT Functions access, instead of reusing your personal account, by following these steps:
- Navigate to your project within the Container Registry.
- Go to the Robot Accounts overview page by clicking on the Robot Accounts Tab.
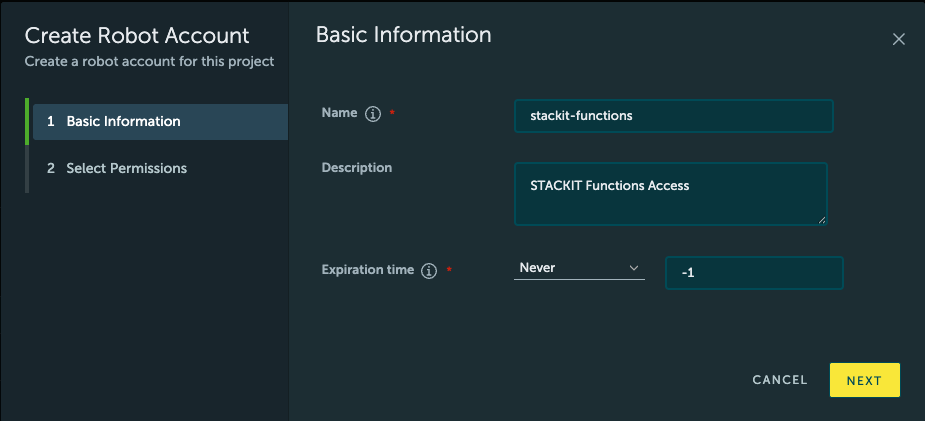
- Click New Robot Account.
- Configure the Basic information for the Robot Account. Name can be any descriptive name, perhaps “stackit-functions”; if you configure an expiration time, do note that your functions may stop working after the expiration time has passed.
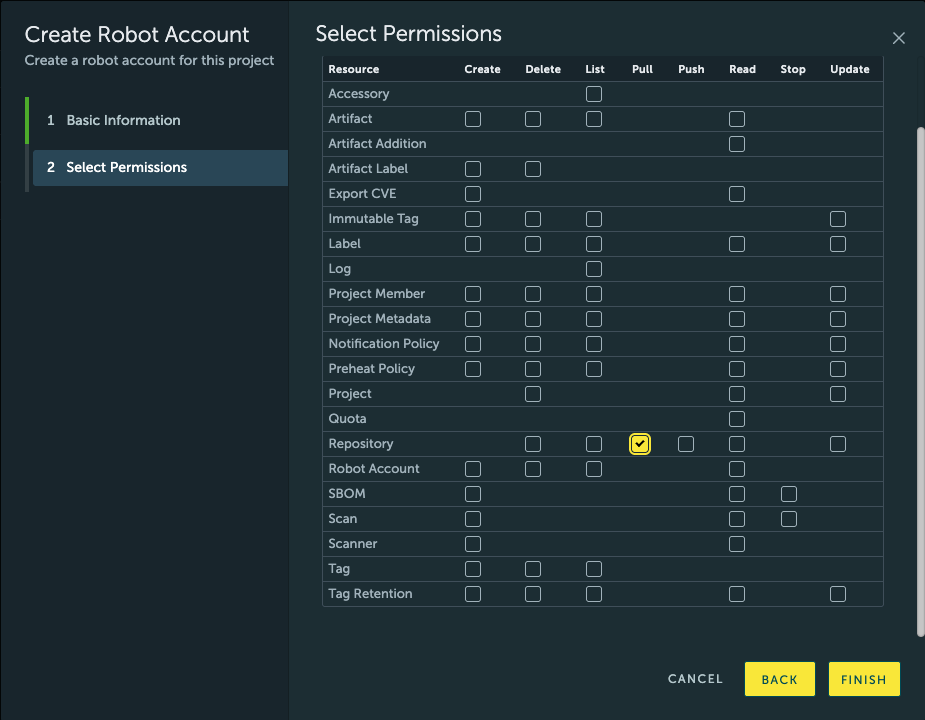
- For Permissions, configure only the “Registry” “Pull” permission, as seen in the screenshot.
- In the final screen, copy the generated username and password (note that you won’t be able to access the password again if you close the screen), and use the following command to configure a new registry:
sfn config registry add registry.onstackit.cloud
Username: robot$...
Password: ***
With this, you are all set up to use a private image registry with your STACKIT Functions project.